This is a work in progress, just a bunch of notes for future myself if I need to do this again.
Windows Server Core does not not have a UI, just a command line.
Start with sconfig(docs), from there you can enable remote desktop, install updates, install roles.
You can then connect to the server via remote desktop and use the console from there. There are also other options like remote powershell, remote server management and so on. Enable Hyper-V.
Install Windows Admin Center either on your local client or on the server (or on a dedicated server) to be able to use UI to setup hyper-v and control most of the other server settings. Although this did not work well for me, it was taking too long to do anything and many actions failed often.
Windows Admin Center did not let me move virtual machines between my two windows servers (one of which was much newer), so I had to manually export and import the VMs.
You can also install a Hyper-V admin (separate from the Hyper-V itself), to your windows clilent, and try managing your server from there, but I could not make it work for some reason.
Importing VM usually fails, as a few settings on the target machine (such as paths to VHDs, or network adapter names) are different from the source machine.
On setting up your domain accounts
It’s better to not use domain admin accounts (which is your YourDomain\Administrator user or any other user from YourDomain\Domain Administrators group). If malicious agent gets access to the domain administrator token (if it’s used a lot – there’s higher probability of this), he can access all the domain computers and can damage all of them. So it’s best to create a separate non-domain admin group, add administrators there and add that group to local administrators group on all servers (can be done via group policy): https://petri.com/manage-workstations-without-domain-admin-rights/
Event Tracing for Windows, or ETW is an efficient facility for applications to write event messages.
You can write the messages to a file or to the real time consumers.
It has a very low overhead, if disabled, and quite efficient if enabled as well. Can be enabled/disabled at runtime.
The Event Tracing API is broken into three distinct components:
Controllers
They configure, start/stop an event tracing session and enable/disable providers. They define size and location of the log file, manage buffer pools and so on. See Controlling Event Tracing Sessions.
Providers
They provide the events. After provider registers itself, a controller can enable/disable it to collect the events it produces. There are different ways a provider can report events (MOF providers, WPP providers, Manifest-based providers, TraceLogging providers), but they all eventually call EventWrite/EventWriteExAPIs at the lower level. See Providing Events.
Consumers
Consumers consume the events. In real time, or by reading a file with events.
Controllers/providers/consumers could be different applications, or could be components used within one application.
Let’s make a simple data logger with ETW
Our application will be writing its events to a file, for later consumption by other apps offline.
Our logging app will be both a controller and a provider.
To start with, we’ll need to include event tracing API headers: #include <evntrace.h> for the controller and #include <evntprov.h> for the provider.
So, as event as provider we need to register one:
// Initialized to random GUID with CoCreateGuid()
GUID providerId;
::CoCreateGuid(&providerId);

// Provider's handle. Unregister with EventUnregister() later.
REGHANDLE providerHandle;

// Registering the provider
::EventRegister(&providerId, nullptr, nullptr, &providerHandle);
providerId is also used in the event controller code below, but does not need to be visible outside our logging app, so can be randomly generated internally.
handle is used in EventWritecalls to log the events.
As an event controller, we need to setup and start a tracing session with:
const char* sessionName = "My unique log session name";

// Event session information
EVENT_TRACE_PROPERTIES properties;

// properties initialization code (skipped, see below) ...

// Stop later with: ControlTrace with
// ControlCode = EVENT_TRACE_CONTROL_STOP.
TRACEHANDLE sessionHandle;

// Starts the trace, copies sessionName into buffer
// whose offset is specified in properties's structure.
::StartTraceA(&sessionHandle, sessionName, &properties)};
sessionName must be unique, otherwise the code will be affecting existing sessions. On the other hand, the sessions are a limited resource, so if your session name is already in use, and you’ve started it, then stop it, and reuse the name.
The tricky part of EVENT_TRACE_PROPERTIES is that it expects that there will be extra buffers located in memory after it – for the log file name and for the session name. LogFileNameOffset and LoggerNameOffset properties are offsets from the beginning of the EVENT_TRACE_PROPERTIES to those buffers.
The important fields for us to start the trace are:
Wnode.BufferSize – size of EVENT_TRACE_PROPERTIES + those buffers allocated after it.
Wnode.Guid – GUID for the session. Can be left empty, and the system will generate a new one. But we will be creating a private session, and in this case, we’ll need to assign providerId to it.
Wnode.ClientContext – clock resolution for the session. We’ll use 1 for QueryPerformanceCounter (see Wnode documentation).
Wnode.Flags – must contain WNODE_FLAG_TRACED_GUID
LogFileMode – how the file is being logged. We’ll use EVENT_TRACE_PRIVATE_LOGGER_MODE | EVENT_TRACE_PRIVATE_IN_PROC values to limit the session to smallest possible scope. Microsoft warns that cross-process event tracing sessions are a limited system resource. And we don’t need that capability. We’ll also use EVENT_TRACE_FILE_MODE_SEQUENTIAL, although I’m not entirely sure what happens if we don’t. See documentations on logging mode constants for details.
LogFileNameOffset – offset from beginning of EVENT_TRACE_PROPERTIES to the log buffer.
LoggerNameOffset – offset from beginning of EVENT_TRACE_PROPERTIES to the event session name buffer.
To simplify the construction of this tricky structure, I made a wrapper. You can construct it, then use its Properties member:
struct EventTracePropertiesWithBuffers {
    EventTracePropertiesWithBuffers(const GUID& sessionId, std::string_view logFilePath) {
        ::ZeroMemory(this, sizeof(EventTracePropertiesWithBuffers));

        Properties.Wnode.BufferSize = sizeof(EventTracePropertiesWithBuffers);
        Properties.LoggerNameOffset = offsetof(EventTracePropertiesWithBuffers, SessionName);
        Properties.LogFileNameOffset = offsetof(EventTracePropertiesWithBuffers, LogFilePath);

        Properties.Wnode.Flags = WNODE_FLAG_TRACED_GUID;
        Properties.Wnode.ClientContext = 1; //QPC clock resolution

         // For private session, use the Provider's id instead of a unique session ID.
        Properties.Wnode.Guid = sessionId;

        // See: https://docs.microsoft.com/en-us/windows/win32/etw/logging-mode-constants
        Properties.LogFileMode =
            EVENT_TRACE_FILE_MODE_SEQUENTIAL
            | EVENT_TRACE_PRIVATE_LOGGER_MODE
            | EVENT_TRACE_PRIVATE_IN_PROC;

        SetLogFilePath(logFilePath);
    }

    void SetLogFilePath(std::string_view logFilePath) {
        assert(logFilePath.size() <= std::extent<decltype(LogFilePath)>::value);
        std::copy(logFilePath.begin(), logFilePath.end(), std::begin(LogFilePath));
    }

    EVENT_TRACE_PROPERTIES Properties;
    char SessionName[256]; // Arbitrary max size for the buffer, but 1024 is the system limit.
    char LogFilePath[1024]; // Max supported filename length is 1024
};
After the session has been started, we need to enable the provider in it with EnableTraceEx2 (some other APIs can be used as well):
Hubitat is one of smart home hubs. It scripting model resembles one SmartThings one, and consists of Groovy scripts of two types – apps and device drivers.
Today we’re going to talk about one aspect of App functionality – handling http requests. Here’s an example app, mostly taken from this Hubitat forum post.
definition(
name: "Http server app sample",
namespace: "me.biocomp",
author: "biocomp",
description: "Testing",
iconUrl: "https://s3.amazonaws.com/smartapp-icons/Convenience/Cat-Convenience.png",
iconX2Url: "https://s3.amazonaws.com/smartapp-icons/Convenience/Cat-Convenience@2x.png",
iconX3Url: "https://s3.amazonaws.com/smartapp-icons/Convenience/Cat-Convenience@2x.png",
oauth: [displayName: "HTML Endpoint", displayLink: "https://sharptools.io"])
preferences() {
page(name: "setupScreen")
}
private def makeUri(String extraPath) {
return getFullLocalApiServerUrl() + extraPath + "?access_token=${state.accessToken}"
}
def setupScreen() {
if (!state.accessToken) {
// Enable OAuth in the app settings or this call will fail
createAccessToken()
}
String uri = makeUri("/");
return dynamicPage(name: "setupScreen", uninstall: true, install: true) {
section(){
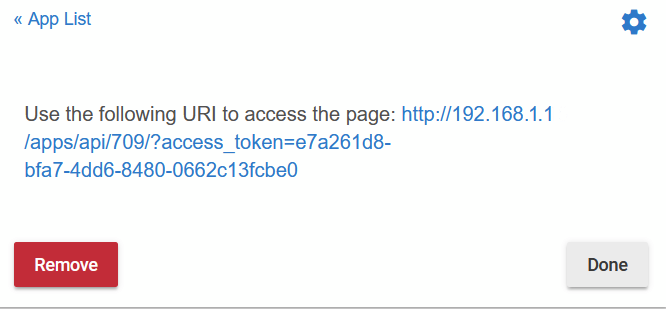
paragraph("Use the following URI to access the page: <a href='${uri}'>${uri}</a>")
}
}
}
mappings {
// The root path - you can also map other paths or use parameters in paths and posted data
path("/") { action: [GET: "mainPage"]}
path("/nested_page") { action: [GET: "nestedPage" ]}
}
def mainPage() {
log.info "Rendering main page"
String uri = makeUri("/nested_page");
html = "<html><head><title>Http server - main page</title></head><body>Use <a href='${uri}'>${uri}</a> to get to nested page</body></html>"
render contentType: "text/html", data: html, status: 200
}
def nestedPage() {
log.info "Rendering nested page"
html = "<html><head><title>Http server - nested page</title></head><body>It's a nested page</body></html>"
render contentType: "text/html", data: html, status: 200
}
You’ll need to enable OAuth for this app for it to work:
After adding this app, you will see this page generated, and if you click on the provided link, you’ll get to app’s main page:
Mappings API for SmartThings is described here and here, could not find good documentation for Hubitat, but they’re pretty much the same. Here’s more or less full list of supported commands and options:
mappings {
    path("/foo/:param1/:param2") {
        action: [GET: "getFoo"]
    }
}

// You can then access them like so in the handler method:
def getFoo() {
    def param1 = params.param1
    def param2 = params.param2
}
Writing this down, since APM 2.6 is outdated, and can only use old Ardupilot v3.2.1 firmware, documentation for which is partially lost.
APMPlanner that works best with this firmware is v2.0.42 (i.e. also not the newest one).
Say, you needed to connect PWM-controlled device (such as MinimOSD) to be reading PWM signal from receiver. But receiver is connected it CPPM mode to APM 2.6. What is the solution?
You can use channels 6-8 (just because APM 2.6 uses channels 1-5 already) of the receiver by reading them via APM 2.6 outputs 6-8.
Just needed to make sure sure that outputs are in correct mode, the variables to check are:
CH6_FUNCTION
CH7_FUNCTION
CH8_FUNCTION
They need to have value of 1, which means RCPassThru. Some other possible values are mentioned here (and the variables were renamed to SERVOn_FUNCTION), but I’m not sure which of the other values are supported in our old APM.
Perhaps this oldest version of the page is more relevant. It shows these values are supported (and there’s more explanations on the page):
Newer Duet boards have proper documentation (here and here), but I had troubles connecting this older one. Some clarifications to existing documentation are below.
Pin for BLtouch PWM
Connecting PWM pin of BLtouch should go to one of 4 PWM heater pins, which are (according to this post):
Pin
Heater / servo #
18
2
21
3
22
4
23
5
I went with using pin 21 (heater 3). Then, disabling the heater #3 and using servo #3 works:
M307 H3 A-1 C-1 D-1; Disable heater 3 (this is from config.g)

M280 P3 S120 I1; Test BLTouch. Using servo 3 (needs to be reverted with I1, when connected directly to Duet 0.8.5). S120 will cause it to extend/retract 10 times.
Input 3.3v connection
This post mentions using resistor for input to Duet, as Duet works on 3.3v, while BLTouch produces 5v. However, Duet documentation says it should tolerate 5v (although recommends using 3.3v as some users reported issues with 5v).
Here’s my library to set hardware breakpoints: github.com/biocomp/hw_break. I used it to catch a rare crash.
Longer story
I’ve had a trouble at work with rare crashes of our service in certain situations. After looking at crash dumps, it turned out that std::function object I was calling was corrupt.
It was a memory corruption, but it happened before this call. Looking at crash dump would not help me determine a root cause.
Attaching a debugger and stepping through the code was not an option either – this situation was very rare, and the code was called a lot.
You can set up data change breakpoints (Visual Studio, WinDbg) in a debugger and have it break when the data at the address changes (or when it’s read or executed). But there was an issue – the address of that std::function object was different for every call. I would still have break at every call and update the address of breakpoint.
Then I wondered if there was a way to set up a similar break point from within my code programmatically (luckily, I could recompile the service). And yes, turns out the hardware breakpoints are a processor feature, you can set up to 4 per thread on x86 via debug registers.
It was a matter of setting proper register values, and on Windows this is done via GetThreadContext/SetThreadContext APIs. The CONTEXT structure will contain debug register values among the others, and you can manipulate them to set up hardware breakpoints.
I’ve discovered this library with good explanations of how everything works. But for every set and remove of a breakpoint, the library would start a thread. It does it because the documentation says you can’t call SetThreadContext without suspending the thread. I suspected this would be slow and it was. The service was uselessly slow at that point, and the crash did not reproduce.
SetThreadContext can update all kinds of registers, including the ones that affect current function parameters and return values. However, since I’m only changing debug registers and only on my own thread, I figured it would be safe to do without suspending my own thread.
I wrote my own C++ single-header library that supports debugging only current thread: github.com/biocomp/hw_break.
And indeed, it worked! It was fast, and the corruption was caught rather quickly. It turned out it was a buffer overrun that corrupted a bunch of stack values below it including my std::function (if size of data written into buffer large enough).
I need to update my google’s dynamic DNS records, but my current setup doesn’t support it out of the box.
I have Frontier’s router that I can’t put into bridge mode. The bridge mode won’t support its two DSL connections, and will have half of the internet speed otherwise (I tried). It supports dynamic dns, but only with noip.com and dyndns.com.
I have USG router behind Frontier’s router. It supports dynamic DNS with Google, but since it’s behind router, it detects its ‘public’ IP as an IP assigned by Frontier’s router.
Solution, Part1 – the DNS update script.
But there’s still a way! I can run a script that calls google’s dynamic dns APIs directly via cron job. And I can run it on my USG.
dig was not available on USG, so I changed the IP detection code to use ‘host’ (from this article).
Here’s my update-dyndns.sh script:
(Raw file here)
USERNAME="my_secret_name"

PASSWORD="my_secret_password"

HOSTNAME="my.domain.com"
# Resolve current public IP
IP=$(host myip.opendns.com resolver1.opendns.com | grep "myip.opendns.com has" | awk '{print $4}')
URL="https://${USERNAME}:${PASSWORD}@domains.google.com/nic/update?hostname=${HOSTNAME}&myip=${IP}"
curl -s ${URL}
/config/scripts folder on USG will hold scripts and will be preserved between provisions. That’s where the script should go.
I use WinSCP to transfer files to cloud key. I copied the script to my home folder, then used ssh to copy from there to /config/scripts, because that folder requires root access and WinSCP can’t handle that: sudo cp update-dyndns.sh /config/scripts/
Add ‘execute’ permission for the script file with: sudo chmod +x /config/scripts/update-dyndns.sh
Important note: don’t forget to have Linux line endings in the script, if you’re editing it on Windows. Sigh.
Note to readers: it’s the first time I’ve ever used stunnel or let’s encrypt, so I don’t really know what I’m doing.
I needed to put https interface over my http-only server (running on Windows). One of the recommended options I’ve found was using stunnel (stunnel.org).
The config accepts traffic from any host on 443 port (default HTTPS port) and redirects it to localhost:80.
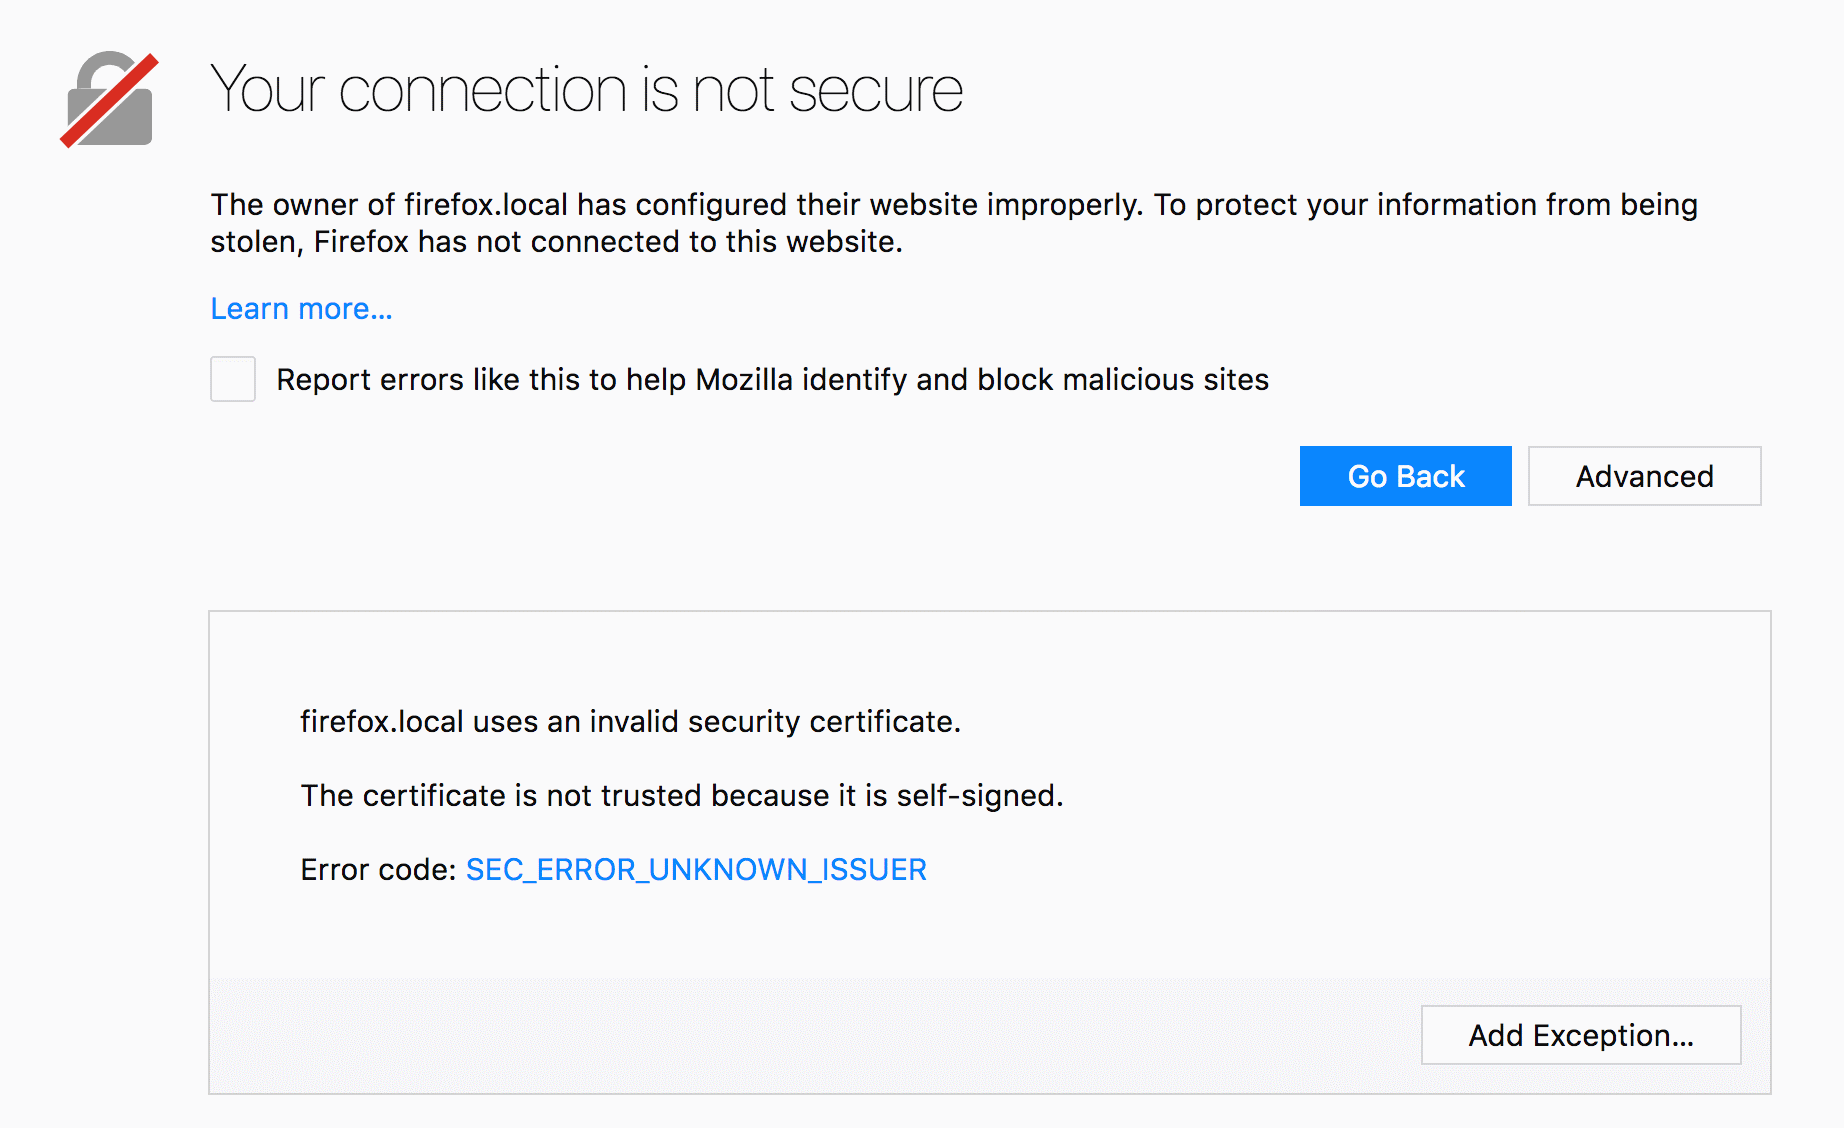
To set up an encrypted connection, you need a certificate. This config uses stunnel.pem (PEM file format). Stunnel can (and does during installation) generate a self-signed one. But it will cause your browser to complain:
You could add that certificate to trusted certificates on your client machine. But this doesn’t scale. The proper way of getting rid of this warning is using a certificate signed by Certificate Authority.
The easiest way of getting it (for free, otherwise they’re not cheap) would be using letsencrypt.org. The cerificate would only be valid for 90 days, and needs to be renewed after that. To simplify creation and renewal, there are numerous clients and scripts. I went with ‘Certify SSL Manager’, because it’s one of the few that works on Windows. I did not compare it to other clients.
Using Certify SSL Manager
The interface is fairly simple. I had two notable issues with it:
1. DNS challenge to confirm that you own your domain
Let’s encrypt needs to confirm that you own a domain for which you’re issuing a certificate. One of the ways of doing that is DNS challenge. And if none of the builtin APIs work for the challenge, there’s a manual way of doing it. I used google domains, which needed manual verification. The challenge consists of adding a TXT DNS record requested by CertifyTheWeb app
[INF] Attempting Domain Validation: yourdomain.com
[INF] Registering and Validating yourdomain.com
[INF] Performing automated challenge responses (yourdomain.com)
[INF] DNS: Creating TXT Record '_acme-challenge.yourdomain.com' with value 'AAAAAAAAAAAAAA-aaaaaaaaaaaaaaaaa-AAAAA', in Zone Id '' using API provider '(Update DNS Manually)'
[INF] DNS: (Update DNS Manually) :: Please login to your DNS control panel for the domain 'yourdomain.com' and create a new TXT record named:
_acme-challenge.yourdomain.com
with the value:
AAAAAAAAAAAAAA-aaaaaaaaaaaaaaaaa-AAAAA
[INF] Requesting Validation from Let's Encrypt: yourdomain.com
After you add the record, you need to go and press ‘Request Certificate’ again. However, when I added the record, it did not work. I then retried requesting certificate, it failed again while asking for another record. Turned out (duh), take time to propagate. So after you add the record, you need to wait till it becomes visible before pressing ‘Request Certificate’.
You can use ‘nslookup -type=txt _acme-challenge.yourdomain.com‘ and such to check the record is available.
2. How do you feed the certificate into stunnel?
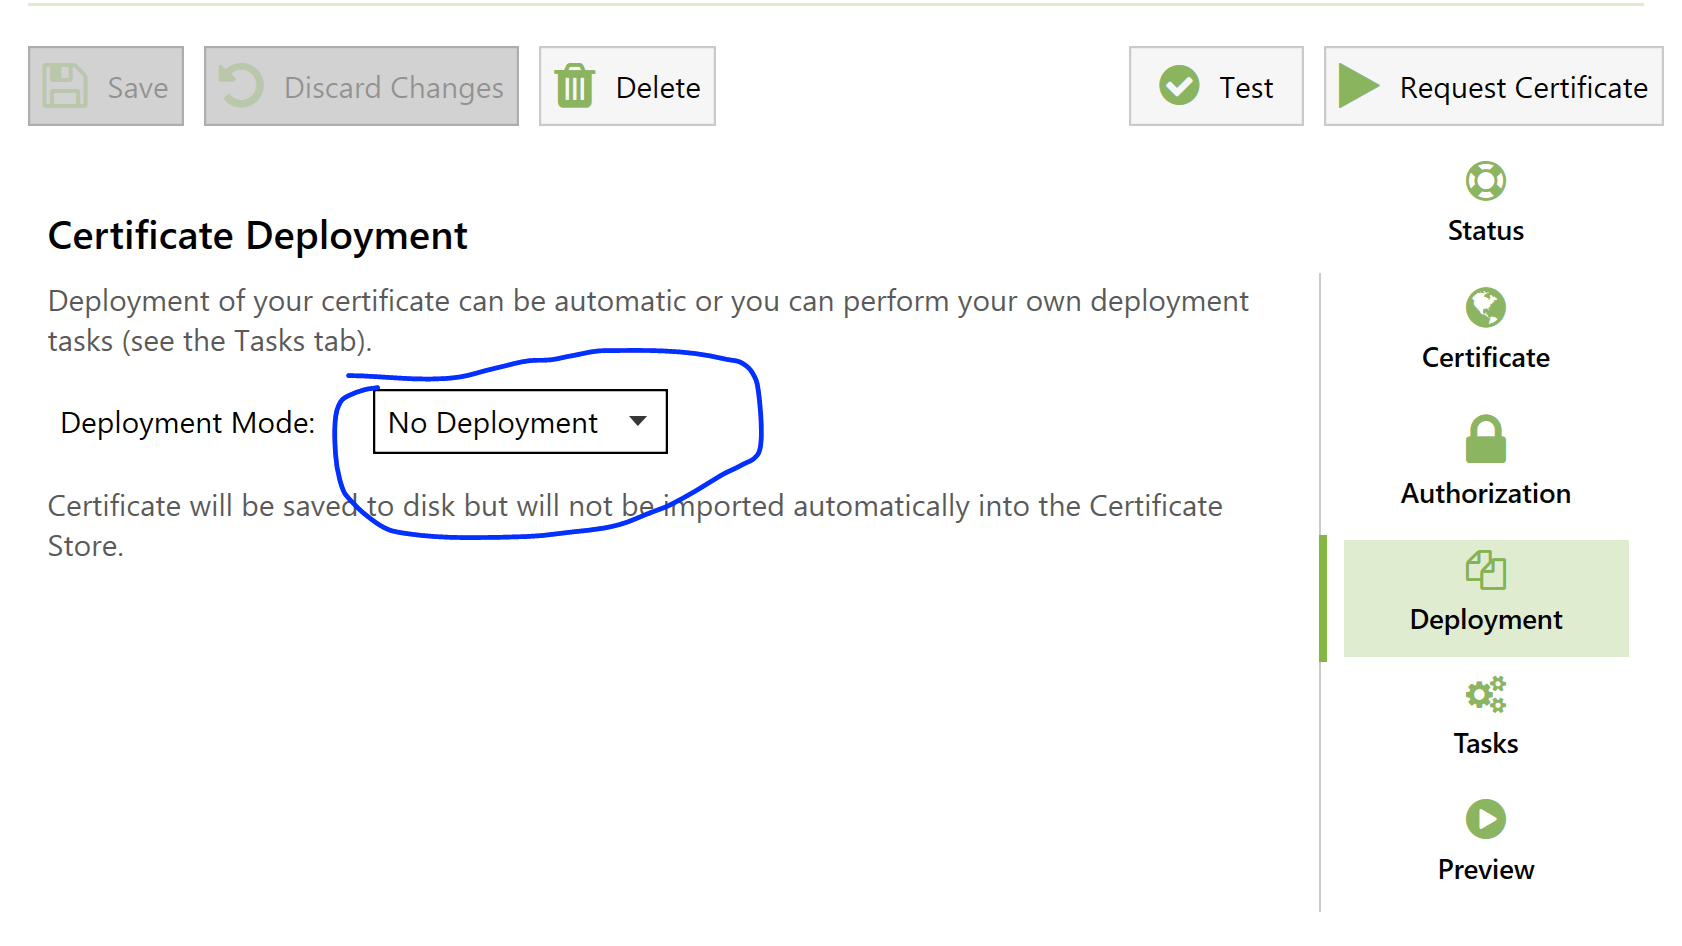
Option 1: Using Certify The Web’s deployment tasks
Disable default deployment, as we won’t need it:
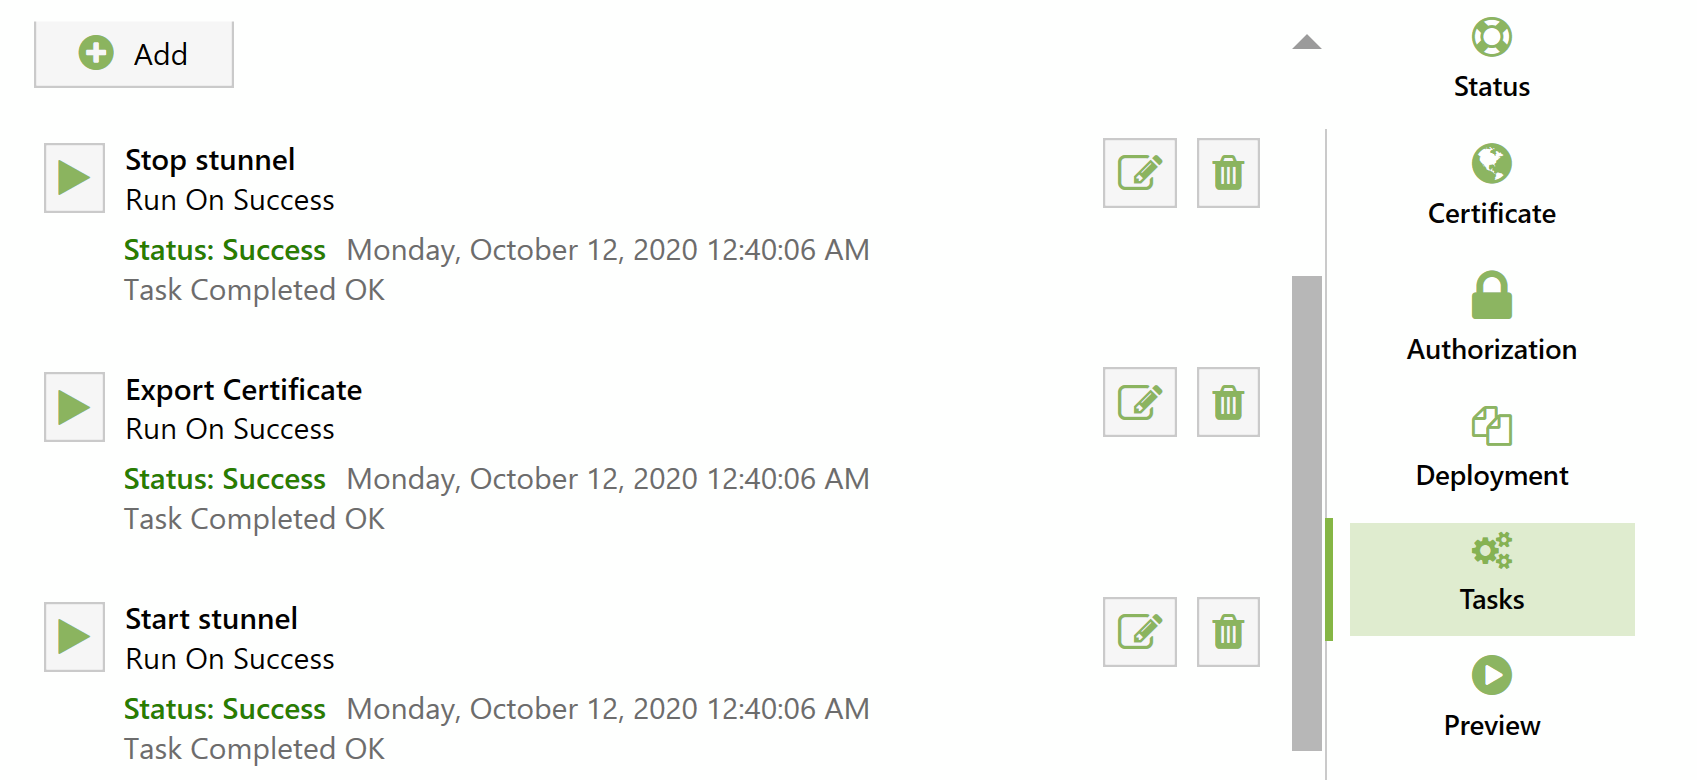
Then, on Tasks tab, add 3 tasks:
Stop stunnel service
Export certificate
Start stunnel service
Stopping and starting service tasks should be self-explanatory (assuming you set it up as a service).
For “export certificate” task, select “PEM – Full Certificate Chain”, and of course specify the file path from where stunnel is going to load the certificate.
I did not change the “Authentication” field for either of the tasks.
This should do the trick. Next time you run certificate update, stunnel will stop, certificate file will be updated and service is going to be started again.
Perhaps, this can be done more efficiently without stopping the service, I’m not sure if it needs to be restarted to reload the certificate, but that’s good enough for me.
Option 2: Store certificate in Windows’ certificate store (by default), convert and feed into stunnel manually
Stunnel is supposed to work with certificate store directly. You need to set engine = capi global option and engineId = capi per-service option. Server loaded the config, but my browsers refused to connect with errors like SSL_ERROR_NO_CYPHER_OVERLAP which means that the browser is expecting ciphers that stunnel (openssl, really) doesn’t provide. So this approach is not working out.
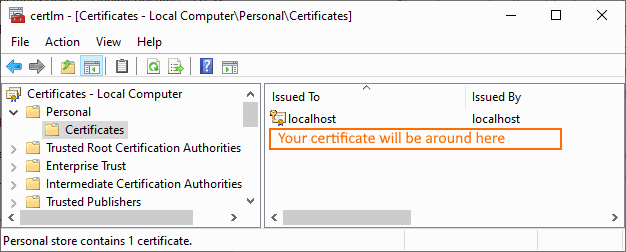
You need to export the certificate. And to start the process, find “Manage Computer Certificates” in windows control panel. Find your certificate in Personal section:
Then I tried exporting the certificate into pem file. I was getting some strange errors about keys while stunnel tried loading the config.
Turns out, I needed to export certificate + key, then put them into one pem file, and use that instead.
Before that, make sure your certificate does have the key (has this small key on its icon):
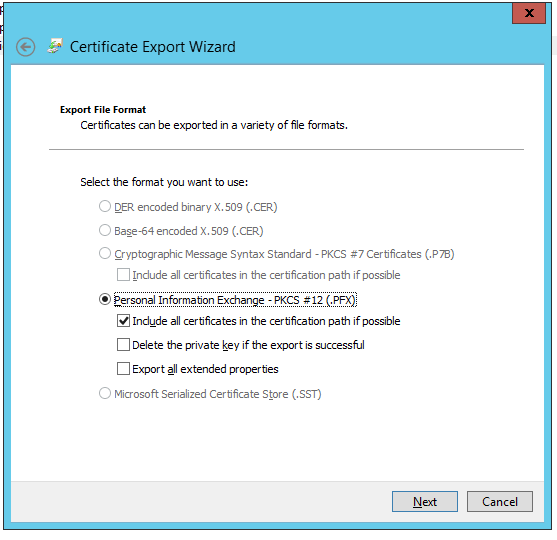
Then export key+certificate (you’ll need to create a password for
your private key on the next step, and then use this key to open the key
with openssl or stunnel):
After exporting key+certificate, use openssl to convert that to pem format. Something along these lines:
You can also add -nodes flag to avoid entering password every time stunnel starts. Note: this is less secure, as if someone gets access to the certificate file, he can then use it to impersonate you, as the password is not needed.
I made a little bat file to simplify the process:
@echo off
IF %1.==. GOTO No1
IF %2.==. GOTO No2
"C:\Program Files (x86)\stunnel\bin\openssl.exe" pkcs12 -in %1 -out %2 -nodes
GOTO End1

:No1
ECHO No param 1 (source certificate)
GOTO End1

:No2
ECHO No param 2 (target certificate)
GOTO End1

:End1
After doing all that, I got my new certificate .pem file, used it in stunnel’s config, and was able to communicate with my server over https without the security warning.
I had a lot of trouble while moving the lock from VeraPlus to Hubitat. Hubitat would just not add the lock whatever I tried.
After reading multiple forums, I’ve found that combination of these steps would solve most of the problems.
Don’t forget to exclude the lock! This is the most important thing. If pairing is not happening for no apparent reason, just try excluding the lock from your current controller. Mine was not indicating that it is included (it should blink its led when battery is attached, if it’s included into z-wave network). But it would fail to be included all the time, with different controllers. When I excluded it, everything started to be OK.
Use fresh batteries. Even half-dead batteries would cause issues with pairing. My pairing issues started with this I believe.
Be sure to have lock and controller in their final locations. If you move controller close to the lock (or vice versa), pair them, and then move it back, the lock (apparently) won’t be able to change the route to the controller. The lock needs to know the correct final z-wave route during pairing.
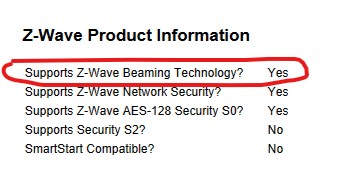
If your lock is too far from controller, you’ll need to have a z-wave device nearby that supports beaming (most wired devices support it, except for old ones). You can find out which devices support beaming on https://products.z-wavealliance.org (for example: https://products.z-wavealliance.org/products/2306/embedpics). Beaming allows efficient communication with battery-powered devices.
I did not need this, but it was mentioned on forums:
See if lock’s firmware is new-ish. Seems like version 5.8 and above is OK (you can find firmware on lock’s sticker). Some people mentioned that Schlage would even send new locks if firmware is old and you ask them to reflash the lock.
Try resetting the lock? But it doesn’t reset z-wave settings.