Note to readers: it’s the first time I’ve ever used stunnel or let’s encrypt, so I don’t really know what I’m doing.
I needed to put https interface over my http-only server (running on Windows). One of the recommended options I’ve found was using stunnel (stunnel.org).
Here’s a minimal config stunnel.config:
 [MyService]
 accept = 443
 connect = 127.0.0.1:80
 cert = stunnel.pem
The config accepts traffic from any host on 443 port (default HTTPS port) and redirects it to localhost:80.
To set up an encrypted connection, you need a certificate. This config uses stunnel.pem (PEM file format). Stunnel can (and does during installation) generate a self-signed one. But it will cause your browser to complain: 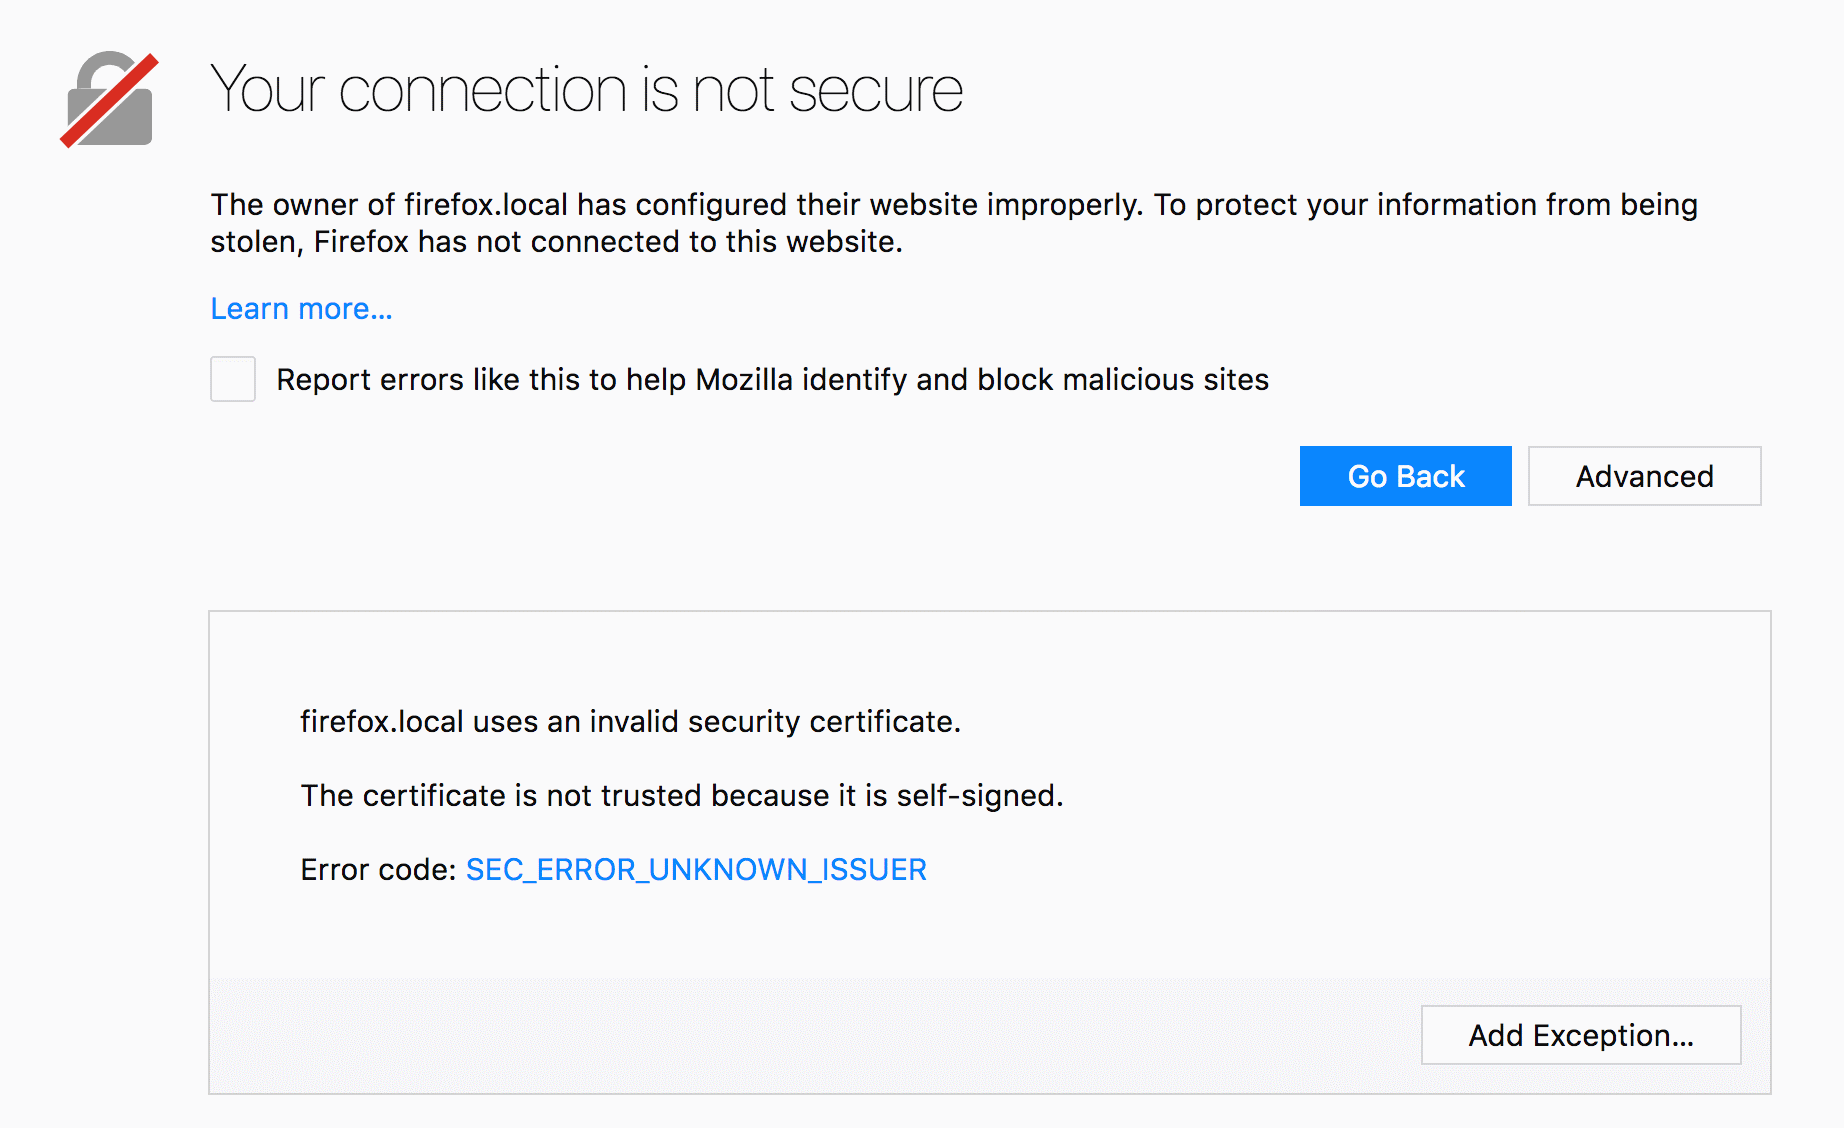
You could add that certificate to trusted certificates on your client machine. But this doesn’t scale. The proper way of getting rid of this warning is using a certificate signed by Certificate Authority.
The easiest way of getting it (for free, otherwise they’re not cheap) would be using letsencrypt.org. The cerificate would only be valid for 90 days, and needs to be renewed after that. To simplify creation and renewal, there are numerous clients and scripts. I went with ‘Certify SSL Manager’, because it’s one of the few that works on Windows. I did not compare it to other clients.
Using Certify SSL Manager
The interface is fairly simple. I had two notable issues with it:
1. DNS challenge to confirm that you own your domain
Let’s encrypt needs to confirm that you own a domain for which you’re issuing a certificate. One of the ways of doing that is DNS challenge. And if none of the builtin APIs work for the challenge, there’s a manual way of doing it. I used google domains, which needed manual verification. The challenge consists of adding a TXT DNS record requested by CertifyTheWeb app
[INF] Attempting Domain Validation: yourdomain.com
[INF] Registering and Validating yourdomain.com
[INF] Performing automated challenge responses (yourdomain.com)
[INF] DNS: Creating TXT Record '_acme-challenge.yourdomain.com' with value 'AAAAAAAAAAAAAA-aaaaaaaaaaaaaaaaa-AAAAA', in Zone Id '' using API provider '(Update DNS Manually)'
[INF] DNS: (Update DNS Manually) :: Please login to your DNS control panel for the domain 'yourdomain.com' and create a new TXT record named:
_acme-challenge.yourdomain.com
with the value:
AAAAAAAAAAAAAA-aaaaaaaaaaaaaaaaa-AAAAA
[INF] Requesting Validation from Let's Encrypt: yourdomain.com
After you add the record, you need to go and press ‘Request Certificate’ again. However, when I added the record, it did not work. I then retried requesting certificate, it failed again while asking for another record. Turned out (duh), take time to propagate. So after you add the record, you need to wait till it becomes visible before pressing ‘Request Certificate’.
You can use ‘nslookup -type=txt _acme-challenge.yourdomain.com‘ and such to check the record is available.
2. How do you feed the certificate into stunnel?
Option 1: Using Certify The Web’s deployment tasks
Disable default deployment, as we won’t need it:
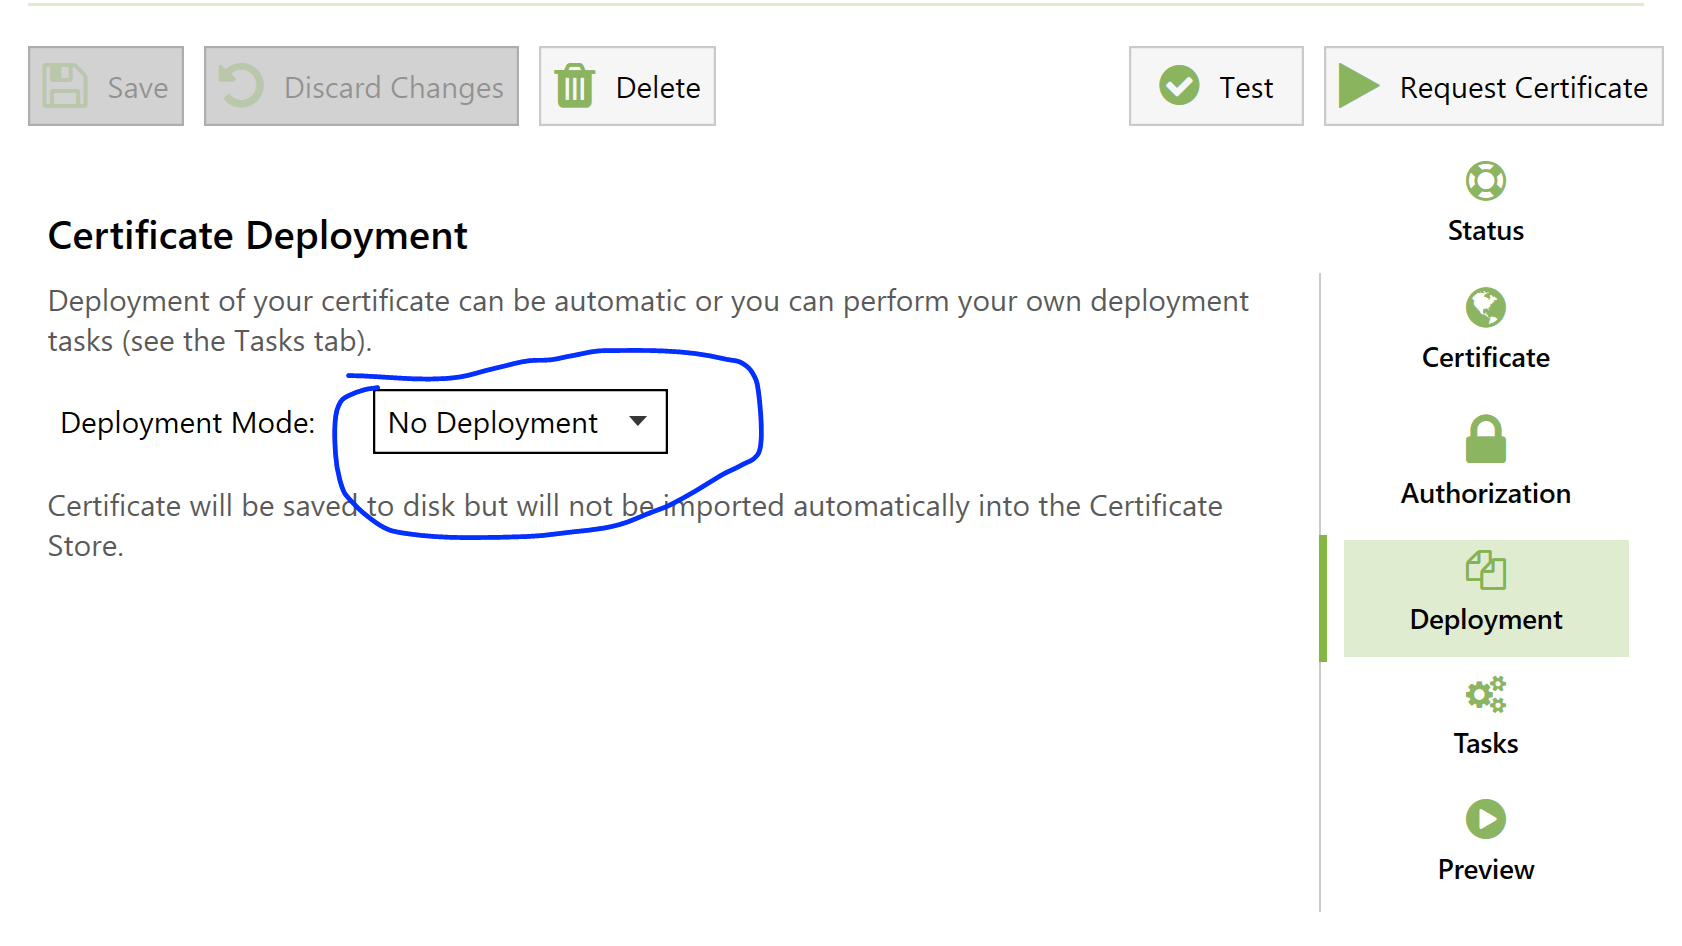
Then, on Tasks tab, add 3 tasks:
- Stop stunnel service
- Export certificate
- Start stunnel service
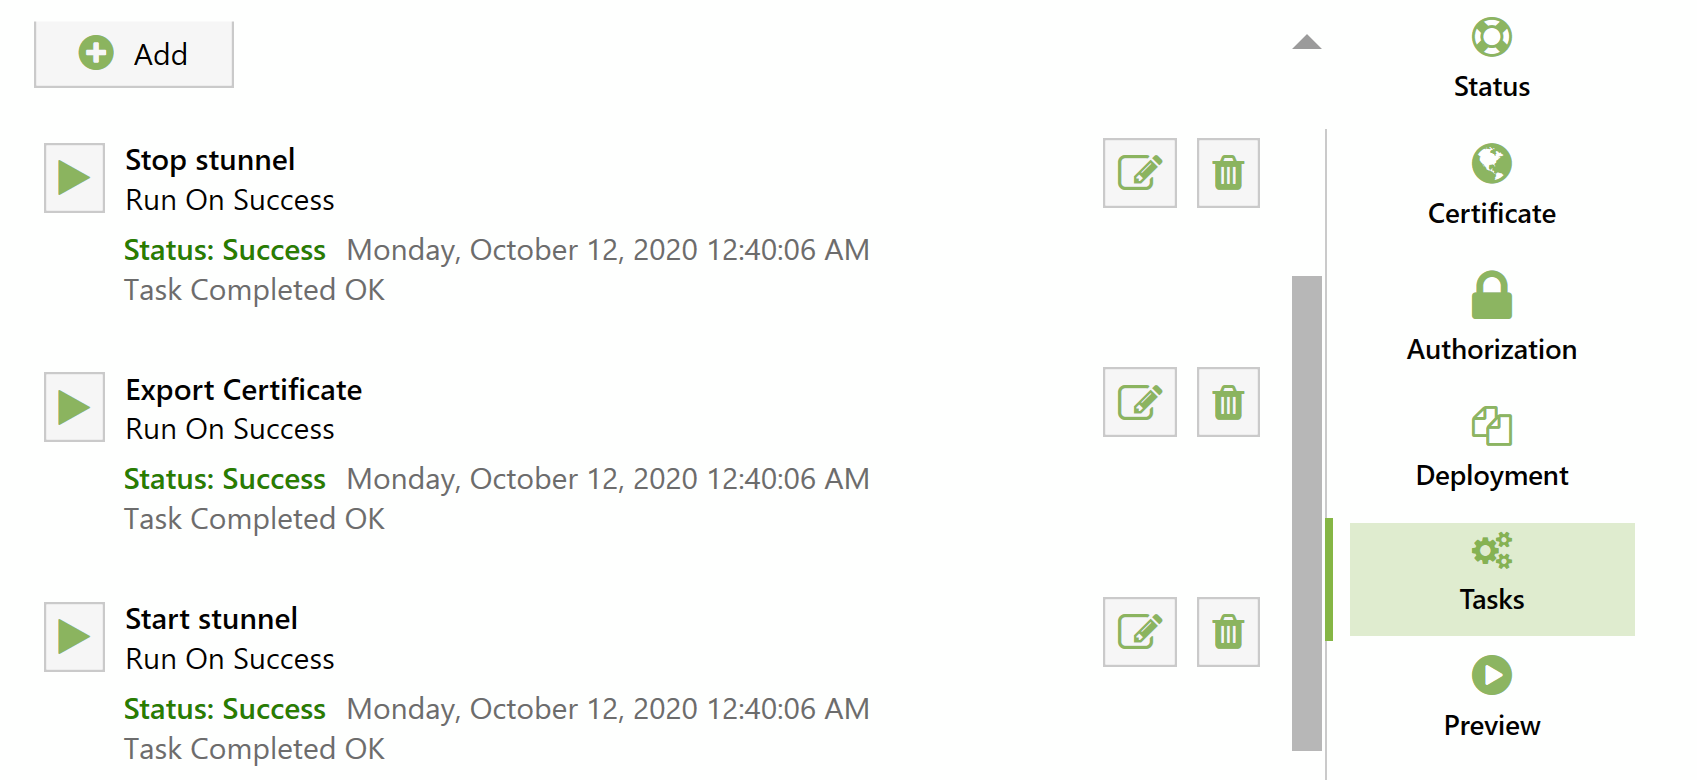
Stopping and starting service tasks should be self-explanatory (assuming you set it up as a service).
For “export certificate” task, select “PEM – Full Certificate Chain”, and of course specify the file path from where stunnel is going to load the certificate.
I did not change the “Authentication” field for either of the tasks.

This should do the trick. Next time you run certificate update, stunnel will stop, certificate file will be updated and service is going to be started again.
Perhaps, this can be done more efficiently without stopping the service, I’m not sure if it needs to be restarted to reload the certificate, but that’s good enough for me.
Option 2: Store certificate in Windows’ certificate store (by default), convert and feed into stunnel manually
Stunnel is supposed to work with certificate store directly. You need to set engine = capi global option and engineId = capi per-service option. Server loaded the config, but my browsers refused to connect with errors like SSL_ERROR_NO_CYPHER_OVERLAP which means that the browser is expecting ciphers that stunnel (openssl, really) doesn’t provide. So this approach is not working out.
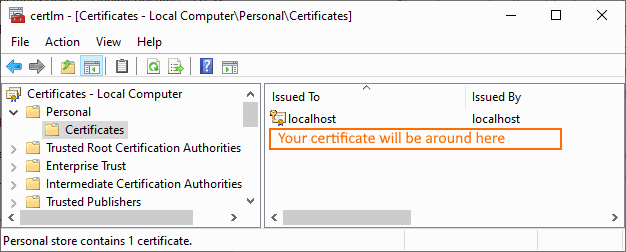
You need to export the certificate. And to start the process, find “Manage Computer Certificates” in windows control panel. Find your certificate in Personal section:
Then I tried exporting the certificate into pem file. I was getting some strange errors about keys while stunnel tried loading the config.
It was hard to find anything about this particular problem, but I finally found one here: https://serverfault.com/questions/926435/how-do-i-get-a-valid-ssl-public-certificate-from-windows-certificate-for-st
Turns out, I needed to export certificate + key, then put them into one pem file, and use that instead.
Before that, make sure your certificate does have the key (has this small key on its icon):

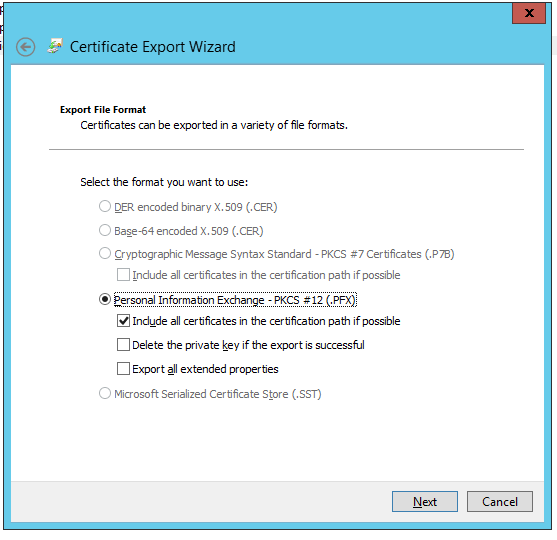
Then export key+certificate (you’ll need to create a password for your private key on the next step, and then use this key to open the key with openssl or stunnel):

After exporting key+certificate, use openssl to convert that to pem format. Something along these lines:
C:\PathToOpenSsl\openssl.exe pkcs12 -in fileGeneratedByWindows -out certAndKeyForStunnel.pem
You can also add -nodes flag to avoid entering password every time stunnel starts. Note: this is less secure, as if someone gets access to the certificate file, he can then use it to impersonate you, as the password is not needed.
I made a little bat file to simplify the process:
@echo off
IF %1.==. GOTO No1
IF %2.==. GOTO No2
"C:\Program Files (x86)\stunnel\bin\openssl.exe" pkcs12 -in %1 -out %2 -nodes
GOTO End1

:No1
ECHO No param 1 (source certificate)
GOTO End1

:No2
ECHO No param 2 (target certificate)
GOTO End1

:End1
After doing all that, I got my new certificate .pem file, used it in stunnel’s config, and was able to communicate with my server over https without the security warning.

Thanks for writing this up! I was stuck on the export.
You can trim this down a little.
Make a new file in your stunnel config folder called MySuperCoolDeployment.ps1 with the following text in side:
param($result)
if ($result.IsSuccess)
{
& ‘C:\PathToOpenSsl\openssl.exe’ pkcs12 -in $result.ManagedItem.CertificatePath -out C:\PathToOpenStunnel\config\stunnel.pem’ -nodes -passin pass:
}
Open Certify.
Pick your cert change the deployment to ‘No Deployment’.
Then click the ‘Show Advanced Options’.
Next click ‘Scripting’.
Now click the ellipses on Post-request PS Script.
Hit test and if all goes well you will have a new stunnel.pem in the config folder.
Click save.
Thanks again for this post, I was kinda stuck until I found it.
Glad it was useful!
Thanks for the info, I’ll definitely take a look at this.
Looks like Certify The Web has a builtin task to create proper pem file, so there’s even no need for a script!