Hubitat is one of smart home hubs. It scripting model resembles one SmartThings one, and consists of Groovy scripts of two types – apps and device drivers.
Today we’re going to talk about one aspect of App functionality – handling http requests. Here’s an example app, mostly taken from this Hubitat forum post.
definition(
        name: "Http server app sample",
        namespace: "me.biocomp",
        author: "biocomp",
        description: "Testing",
        iconUrl: "https://s3.amazonaws.com/smartapp-icons/Convenience/Cat-Convenience.png",
        iconX2Url: "https://s3.amazonaws.com/smartapp-icons/Convenience/Cat-Convenience@2x.png",
        iconX3Url: "https://s3.amazonaws.com/smartapp-icons/Convenience/Cat-Convenience@2x.png",
        oauth: [displayName: "HTML Endpoint", displayLink: "https://sharptools.io"])

preferences() {
    page(name: "setupScreen")
}

private def makeUri(String extraPath) {
    return getFullLocalApiServerUrl() + extraPath + "?access_token=${state.accessToken}"
}

def setupScreen() {
    if (!state.accessToken) {
        // Enable OAuth in the app settings or this call will fail
        createAccessToken()
    }

    String uri = makeUri("/");
    return dynamicPage(name: "setupScreen", uninstall: true, install: true) {
        section(){
            paragraph("Use the following URI to access the page: <a href='${uri}'>${uri}</a>")
        }
    }
}

mappings {
    // The root path - you can also map other paths or use parameters in paths and posted data
    path("/") { action: [GET: "mainPage"]}
    path("/nested_page") { action: [GET: "nestedPage" ]}
}

def mainPage() {
    log.info "Rendering main page"
    String uri = makeUri("/nested_page");
    html = "<html><head><title>Http server - main page</title></head><body>Use <a href='${uri}'>${uri}</a> to get to nested page</body></html>"
    render contentType: "text/html", data: html, status: 200
}

def nestedPage() {
    log.info "Rendering nested page"
    html = "<html><head><title>Http server - nested page</title></head><body>It's a nested page</body></html>"
    render contentType: "text/html", data: html, status: 200
}
You’ll need to enable OAuth for this app for it to work:

After adding this app, you will see this page generated, and if you click on the provided link, you’ll get to app’s main page:
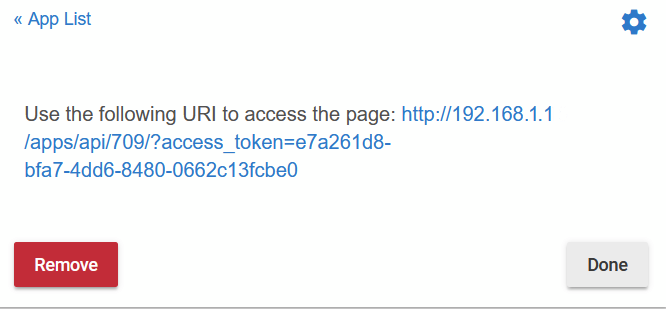
You can then follow that URL, and will get onto main page, which has a link to the nested page: http://192.168.1.1/apps/api/709/nested_page?access_token=e7a261d8-bfa7-4dd6-8480-0662c13fcbe0
Mappings API for SmartThings is described here and here, could not find good documentation for Hubitat, but they’re pretty much the same. Here’s more or less full list of supported commands and options:
mappings {
    path("/foo") {
        action: [
            GET: "getFoo",
            PUT: "putFoo",
            POST: "postFoo",
            DELETE: "deleteFoo"
        ]
    }
    path("/bar") {
        action: [
            GET: "getBar"
        ]
    }
}

def getFoo() {}
def putFoo() {}
def postFoo() {}
def deleteFoo() {}
def getBar() {}
Another example – using path parameters:
mappings {
    path("/foo/:param1/:param2") {
        action: [GET: "getFoo"]
    }
}

// You can then access them like so in the handler method:
def getFoo() {
    def param1 = params.param1
    def param2 = params.param2
}